In this article you’ll learn how to connect an Angular app to a REST API.
This post is part of the Dockerized Django Back-end API with Angular Front-end Tutorial. Check out all the parts of the tutorial there.
In the last part of the tutorial, we’ve learned how to build an Angular app using Docker. In this blog post, you’ll learn how to consume the REST API in Angular.
To get the code to where we left off in the last blog post, use:
$ git checkout v1.6
Overview of the Default Angular AppComponent
Firstly, let’s look at the existing code in the angular-app directory.
The default Angular CLI application that we’ve created in the last blog post comes with one Angular component out-of-the-box, namely AppComponent.
Components are simply TypeScript classes with an HTML template and optional CSS. They are used for sections of the UI, e.g. navigation bar, sidebar, etc.
Let’s quickly explain the files that were created by default in the angular-app directory:
app.module.ts – think of it as a centralised place for everything in your app. Components, services, and modules that you create need to be added to the @NgModule directive:
- components go to
declarations.
- modules go to
imports.
- services go to
providers.
bootstrap includes just the main (root) component, i.e. AppComponent.
app.component.ts
- the
selector identifies how the component can be referenced in HTML, the templateUrl points to a HTML file, and styleUrls points to a CSS file.
app.component.spec.ts – file used for tests.app.component.html – this is the actual template which tells Angular how to render the component.app.component.css – CSS for the template.
Creating an Angular Component
Now that we have an overview of the existing Angular files, let’s build an Angular component in order to create a basic UI that allows the user to see a list of Todo items.
Navigate to the angular/angular-app directory and run from the terminal:
$ ng generate component task-list
You’ll notice a new task-list directory was generated under angular-app/src/app. This directory contains the files for the TaskListComponent. Additionally, the component was automatically added to the declarations directive in src/app/app.module.ts.
In task-list.component.ts, there is an ngOnInit() method. This is a lifecycle hook that runs when a component is initialised.
Next, let’s check that the generated component works. We’ll need to reference the component using the selector found in task-list.component.ts, namely app-task-list.
Edit the src/app/app.component.html file and replace its contents with:
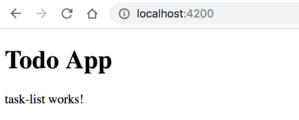
If you now go to http://localhost:4200/, you’ll see that the task-list works! message will be displayed. This is simply the default template found in task-list/task-list.component.html.
To get the code to this stage, run:
$ git checkout v1.7
Generate an Angular Service to Call the API
In this section, we’ll proceed to generate an Angular service that will connect to the DRF REST API.
In Angular a service is a class that provides reusable functionality across components. Generally, a service is a Singleton, meaning they will “live” as long as our application lives.
In most cases, you can think of components to be concerned with pieces of the UI, whereas services can be delegated tasks by components. These tasks can include fetching data from a server, dealing with input validation, or logging app data.
Let’s create a new service for calling the API. From the angular-app directory, run the command:
$ ng generate service api
The command will create the files api.service.ts and api.service.spec.ts in the angular-app/src/app directory. The first contains the service code, while the latter contains testing code.
For making HTTP requests in Angular, we’ll use the HTTPClient module. Import it and add it to the imports directive in app.module.ts:
Import and inject the HttpClient class in the service src/app/api.service.ts:
Creating a Task Interface
In TypeScript, we can use an interface for type-checking purposes. Basically, an interface just defines the properties of an object and their type. Let’s make a Task interface to define how a task object looks like.
Create a new file in src/app/ called task.ts.
GETting the Tasks from the API
Let’s retrieve the Todo tasks by making a GET request to the /api/task/ endpoint.
We’ll do this in three steps:
- Create a method in the API service to query the endpoint.
- Call the method from the
TaskListComponent class.
- Display the returned tasks in the component template.
1. Create a method in the API service to query the endpoint
Edit src/app/api.service.ts and add the following:
Here, we can see that the getTasks() method returns an Observable, which we import from RxJS (Reactive Extensions for JavaScript).
Observables are a way of message passing in a publisher-subscriber model in an application. They are useful for processing asynchronous data streams, such as data received from calling an API.
Lastly, the Observable itself emits arrays of Task items, hence the typing Observable<Task[]>.
2. Call the Method from TaskListComponent
Edit src/app/task-list/task-list.component.ts, inject the API service, and call the getTasks() method:
The $ at the end of tasks$ is a naming convention for Observables.
3. Display the Results in the Component Template
Next, we will display the tasks in the component template. Open src/app/task-list/task-list.component.html and add the code:
Using the async pipe, we can subscribe to an Observable and iterate over the array of values returned.
Enable CORS in DRF
If you now access the app, you’ll see in the browser console that there’s an error related to the CORS (Cross-Origin Resource Sharing) policy.
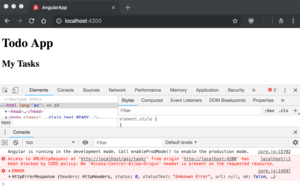
The problem is that the browser is only allowed to send/receive requests from http://localhost:4200, where we serve the Angular app. The browser blocks requests made to the Django DRF API, which is served on http://localhost:80, from the Docker container.
Fortunately, we can tell the browser to allow requests by employing the django-cors-headers package:
- Add
django-cors-headers to django/requirements.txt:
- Next, add the
corsheaders app to todoproj/settings.py:
- Then, add
corsheaders.middleware.CorsMiddleware to the middleware list in todoproj/settings.py:
- Lastly, you need to specify a list of hosts that are allowed to make cross-site HTTP requests. Also in
todoproj/settings.py, add the following at the end of the file:
Here, I’ve also added localhost:8080 in case we make the request from the Angular app served by the Docker container instead of the ng serve one.
You need to rerun docker-compose build in the repo root so django-cors-headers is installed in the Django Docker image. After, rerun docker-compose up as usual and migrate the database.
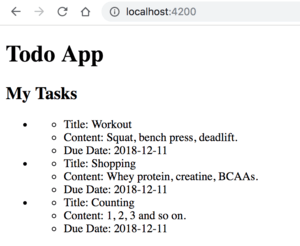
If you now visit http://localhost:4200, you’ll see the dummy Todo tasks being displayed:
To get the code to this point of the tutorial, run:
$ git checkout v1.8
Summary
In this part of the tutorial, we’ve learned how to connect our Angular app to our Django DRF REST API to retrieve the tasks from our Todo application. We’ve also been introduced to Angular components, services, and Observables.
In the next part, we’ll see how we can enhance our Angular app to handle creating and updating task items.