In this multipart tutorial, you will learn how to build a production-ready REST API using Python and the Django REST Framework (DRF). You will interact with the API using an Angular app as the front-end layer. We will also cover authentication and deploying the stack as a Docker container in a “live” production environment.
Tutorial Table of Contents
- Building a Basic API with Django REST Framework in Docker (this post)
- Adding Detail Views to a Django DRF API in Docker
- Building an Angular App in a Secure and Compact Docker Image
- Connecting an Angular App to a REST API
- Improving an Angular Todo App to Manage Tasks via a REST API
- Securing a Django REST Framework API Using Auth0
- Securing an Angular App Using Auth0 and JWT Authentication
- Adding Object Level Permissions in Django REST Framework
- Preparing a Django DRF API for Production in Docker
- Preparing an Angular App for Production in Docker
- Building a Docker Image in Google Cloud Build
- Building a Docker Image from a Private GitHub or Bitbucket Repository in Google Cloud Build
- Connecting Django to a PostgreSQL Database in Cloud SQL
- Deploying a Docker Container on a VM in Google Cloud Platform
- Serving an Angular App’s Static Files from Google Cloud Storage
GitHub repo: https://github.com/dnstanciu/drf-angular-docker-tutorial
Overview
The Django back-end will be purely an API that is consumed by our Angular Single-Page Application (SPA).
We will use Auth0 as our authentication provider for the API and Angular app.
The whole application stack will be bundled as a Docker image. We will also learn how to deploy the image as a container using Google Cloud Platform.
Technologies Used
- Django 2.1.5
- Django REST framework 3.9.0
- Angular 7.2
- Docker Engine 18.09.0
In this first part of the tutorial, we will build a basic REST API using the Django Rest Framework (DRF) in Docker.
The API back-end will allow a user to create and update tasks as part of a simple Todo application.
Django is a mature and powerful Python web framework and allows fast development given its existing packages provided by the Django community.
Django REST framework is a flexible tool for building web APIs. A few of its advantages are as follows:
- out-of-the-box web browsable API – this is especially useful for developers.
- authentication policies
- serialization
- good documentation
Docker is a tool that allows you to bundle your application and all of its libraries and dependencies into a Docker image. This image can then be easily deployed as a container in the cloud using a cloud service provider such as Google Cloud Platform.
If you don’t currently use Docker, definitely do yourself a favour and invest a bit of time to learn it. Especially if you’re doing web development, it will save you a lot of time troubleshooting and checking that development and production dependencies coincide.
Initial Project Setup
Before we get into building the actual API, let’s do some preparations.
The following workflow has worked well for me for more complex projects so I hope you’ll also find it useful. Let me know in the comments if you have any tips on how I can make the process smoother.
First of all, we’ll create a repository for our application.
I will use this Github repo for the tutorial: https://github.com/dnstanciu/drf-angular-docker-tutorial
I recommend you follow along, and if something doesn’t work, you can checkout the repo at various stages in the tutorial using the tags I’ve created.
In a later part of the tutorial I’ll also show you how to build Docker images from private GitHub or Bitbucket repositories.
I’ll use only one repository for both front-end and back-end code. One could separate the two layers in two repos, but because the only consumer of the API is the Angular app and because of the app’s relatively simple complexity, it makes sense to keep everything in one repo for this tutorial.
1. Creating the Dockerfile for the Django API
First of all, in the repo root, let’s create a directory for holding the Django back-end code. In the terminal, run:
$ mkdir django
Next, in the django directory, create a requirements.txt. This will contain the dependencies for our API. For now, add the following to this file:
This simply means we add the Django, DRF and Python PostgreSQL adapter packages to be later included in our Docker image.
Then, also in the django directory, create a Dockerfile file with the contents:
This Dockerfile uses the basic Python 3 Docker image as a starting point.
Setting PYTHONUNBUFFERED to 1 means that log messages will be immediately dumped to the standard output stream instead of being buffered.
We then proceed to copy the requirements.txt file to the Docker image and install the dependencies using pip.
Next, we create a /code directory on the image which will hold the project code. We set that directory as the working directory on the image.
Afterwards, we copy the project code (i.e. what’s in the django directory in the repository) in the /code directory using the COPY command.
Further, port 80 is exposed on the container which means that the container will listen on port 80 at runtime.
Lastly, we specify that we want to start the Django development web server when the container will be started. We will use this for local testing, but in production we need to use a proper web server such as uWSGI or Gunicorn.
From the django directory, test that you can successfully build the image from the terminal using:
$ docker build .
As a side note, there is a reason why we copy the project code after we install the dependencies.
The reason is that Docker caches the build steps of the image in order to save image build time.
Copying the project code after dependencies are installed means that Docker will cache the image to include the installed dependencies. This means that when you change your project’s source code, Docker will rebuild the image from the point where we copy the project’s code onto the image, without reinstalling dependencies.
2. Creating the docker-compose File
In this tutorial, we’ll run multiple containers locally for development purposes. In production, we’ll be running a single container.
Using Docker Compose, we can run and coordinate multiple Docker containers. One could also use a Compose file as a basis for migrating towards a multi-container deployment setup using Kubernetes, but this is out of scope for this tutorial series.
So, let’s create a docker-compose.yaml file in the root of the repository with the following contents:
Here we specify that we are using version 3 of the Compose file format.
In the services definition, we specify what configuration should be applied to each container.
For now, we only have one container that’s running Django.
Using container-name, we specify that the container should be named dj instead of a generated default name.
In build, we give the path to Django’s Dockerfile we created in the previous step.
The command definition tells the Docker container to start the Django development server on port 80 on container start-up.
In volumes, we map the django directory in our repo to the /code directory in the Docker container.
In ports, we map port 80 on the host machine with port 80 on the container in the HOST:CONTAINER format.
Creating the Django Project and API App
We are now ready to create our Django project and app for our API.
-
Change to the repo root.
-
Create a Django starter project by running the docker-compose run command from the terminal:
$ docker-compose run dj django-admin.py startproject todoproj .
Compose will run django-admin.py startproject todoproj . in a container, using the dj service’s image and configuration. This will create the files representing a Django project.
FYI, the . at the end of the command will tell the django-admin.py startproject command to create the Django project in the existing directory, i.e. /code as we’ve set that to be the working directory in the Dockerfile.
- Due to the volume mapping we’ve done in the Compose file, we can now find the new Django project files in the
django directory of the repo. Let’s list them:
$ cd django
$ ls -l
total 24
-rw-r--r--  1 dragos  staff  310  5 Dec 12:53 Dockerfile
-rwxr-xr-x  1 dragos  staff  540  5 Dec 13:11 manage.py
-rw-r--r--  1 dragos  staff 50  5 Dec 12:42 requirements.txt
drwxr-xr-x  6 dragos  staff  192  5 Dec 13:11 todoproj
- We can now create a Django app to hold our models and views. From the repo root, run the following:
$ docker-compose run dj python manage.py startapp todoapi
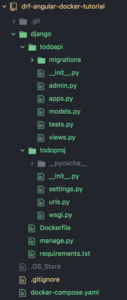
Here is the project file structure after running all of the above:
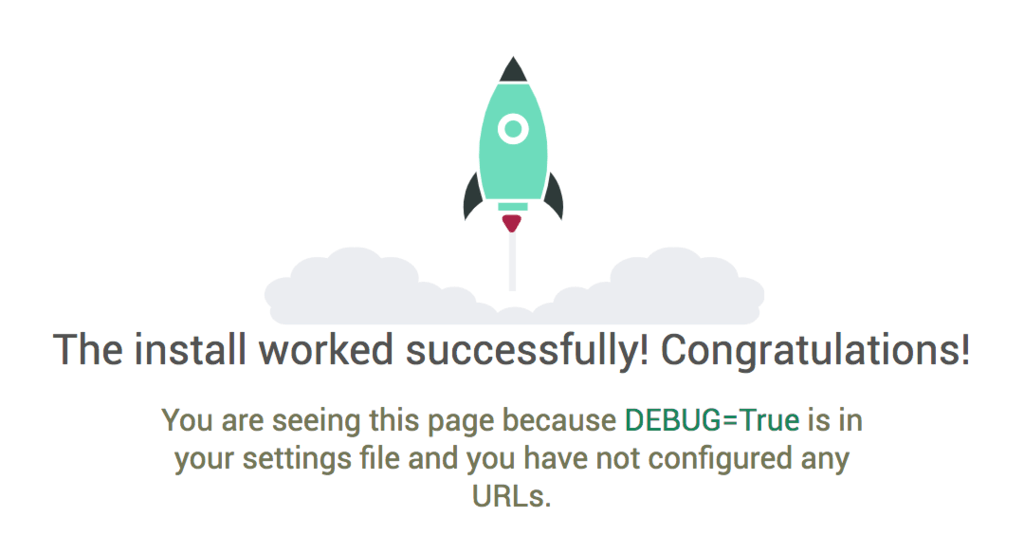
- You can now run the project and check that it works by running the following command from the repo root:
$ docker-compose up
Nice! If you now go to http://localhost:80 you should see the Django welcome screen, meaning that the development server is running properly:
Connecting to the PostgreSQL Database
In this section, we will connect Django to a PostgreSQL database.
By default, Django uses SQLite as its database, which is bundled with Python. For both development and production, we want to use a more robust database engine, namely PostgreSQL.
In development, we’ll actually spin off a new Docker container that runs PostgreSQL. In production, we’ll use a PostgreSQL database hosted on Cloud SQL, which is a database service part of Google Cloud Platform.
- Add a Database Service to docker-compose.
In this step, we’ll add a database service in our docker-compose file that the Django container will connect to.
Update your docker-compose.yaml file as follows:
The db container uses the Docker postgres image. By default, this image exposes port 5432 (the postgres port) and includes a default postgres user and postgres database. We will use this database for the Django container.
The depends_on key tells Compose that the dj (Django) service is dependent on the db service.
- Modify settings.py in the Django Project.
Next, we need to tell Django to use the PostgreSQL database instead of the default SQLite one.
In the Django project directory, edit the todoproj/settings.py file and replace the DATABASES = {...} section with the following:
-
From the repo root, re-run the docker-compose up command.
-
List running containers.
To see that the two containers are running, execute the docker ps in a new terminal:
$ docker ps
CONTAINER ID  IMAGE  COMMAND  CREATED STATUS  PORTS  NAMES
4862ac29cce4  drf-angular-docker-tutorial_dj "python manage.py ru…" 15 minutes ago  Up 15 minutes 0.0.0.0:80->80/tcp dj
83195aa165c6  postgres "docker-entrypoint.s…" 15 minutes ago  Up 15 minutes 5432/tcp drf-angular-docker-tutorial_db_1
- Shutdown services using
docker-compose down from the repo root, in a new terminal:
$ docker-compose down
Stopping dj ... done
Stopping drf-angular-docker-tutorial_db_1 ... done
Removing dj ... done
Removing drf-angular-docker-tutorial_db_1 ... done
Removing network drf-angular-docker-tutorial_default
Great job! Now you have a nice Dockerized development environment, with two containers: one for Django and the other for your PostgreSQL database.
You can checkout the code at this point in the tutorial using:
$ git checkout v1.0
Creating the Data Model
In this section, we will create our model, which is essentially the database structure for our app.
Since our API will allow listing and updating tasks as part of a Todo app, let’s create a simple Task model in the todoapi/models.py file:
For the Django project to recognise the todoapi application, we need to add it to INSTALLED_APPS in todoproj/settings.py like so:
We now need to create and apply the database migrations in order to update our database schema.
To do this, we first connect to the Django container. First spin up the containers with docker-compose up as usual, then from a new terminal, run:
$ docker exec -it dj bash
The docker exec command allows you to run commands inside an existing container.
The -it part is a combination of -i and -t, which stands for --interactive (“Keep STDIN open even if not attached”) and --tty (“Allocate a pseudo-TTY”), respectively.
Lastly, bash is the command to run in the container.
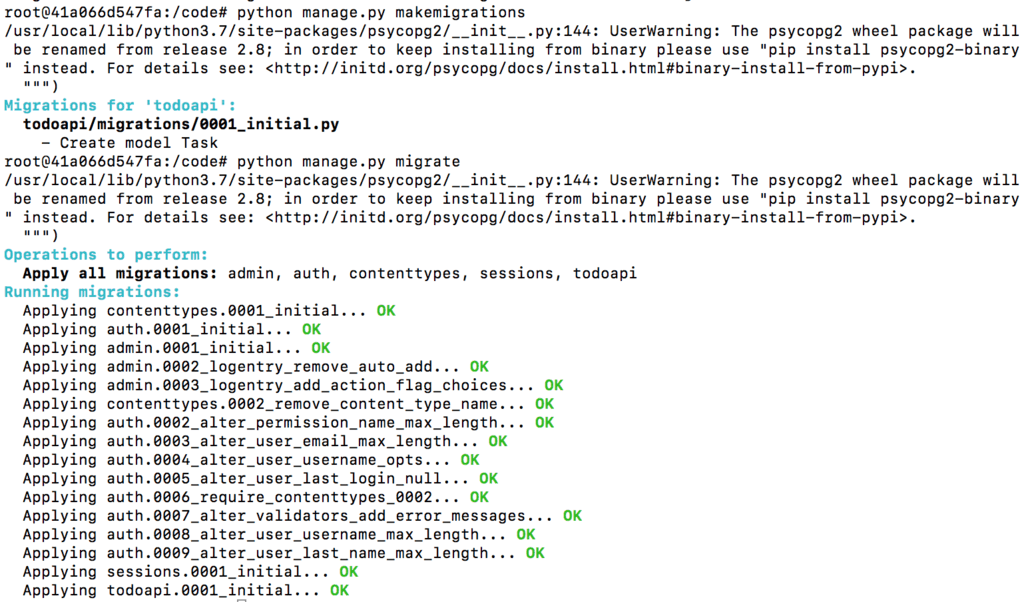
Now that we are in the container, let’s create the migration files using python manage.py makemigrations and apply them using python manage.py migrate:
Creating the API Serializer
Serializers allow conversion from received data in formats such as JSON to Python objects and viceversa.
Create a new file todoapi/serializers.py containing:
The ModelSerializer class easily creates a serializer with fields corresponding to our Task model fields.
The fields attribute is used to specify which fields we want to use in the model serializer.
Creating the API View
Next, we need to implement a View in order to handle incoming API requests.
In Django, a View is simply a function that takes an HTTP request and returns an HTTP response.
For our initial version of the view, we’ll use the APIView from the Django REST framework to implement handling GET requests to list all our Task objects. Modify todoapi/views.py as follows:
We define a get() method to handle incoming GET requests.
Task.objects.all() queries the database and retrieves all Task objects as a Django queryset.
We then pass this queryset to an instance of TaskSerializer, specifying many=True. This tells the serializer that we want to serialize a collection of objects, and not just a single instance.
Lastly, with the return Response(serializer.data), we return the list of serialized Task objects.
Testing the API View
There are a couple of more things to do before we can test our API:
- We need to tell Django to map the
TaskList API view to a URL. Modify todoproj/urls.py as follows:
Here we simply map the api/task/ endpoint to a callable TaskList view. A callable view simply means that the view takes a request object and returns a response object. We get this callable view by using the as_view() function.
- Add
rest_framework to our list of INSTALLED_APPS in todoproj/settings.py:
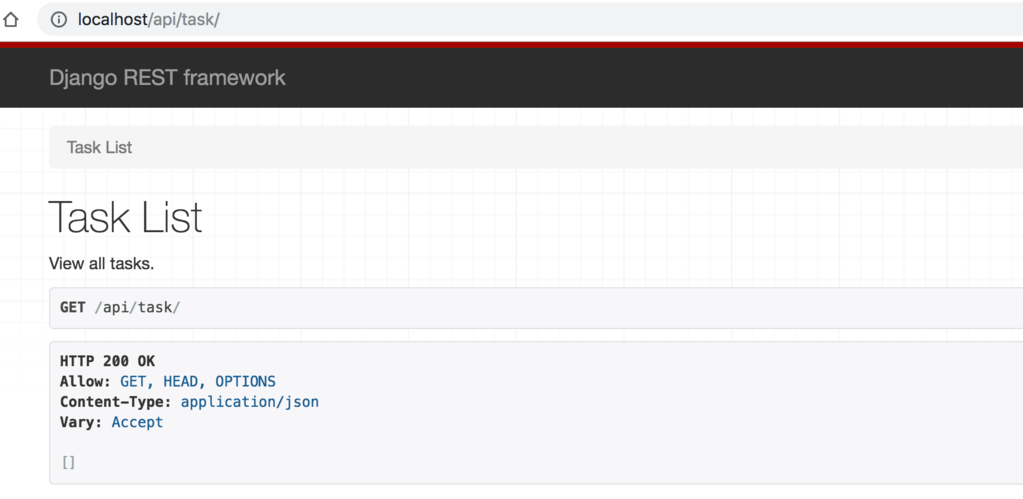
If you now restart the Django container, you can go to http://localhost/api/task/ to see if the endpoint works. Because we haven’t actually created any Task objects yet, the response will be an empty list.
Nice! You can checkout the code at this point using:
$ git checkout v1.1
If you get an error such as “relation task does not exist”, it means you need to apply migrations to your database.
Creating Initial Dummy Data
To make sure that the API can actually return data, we can create a data migration file that will populate the database with a few dummy Task items.
First, create an empty migration file while connected to your Django container:
$ python manage.py makemigrations --empty todoapi --name dummy_tasks
Now open the new file in todoapi/migrations/0002_dummy_tasks.py and add the following:
To apply this migration, run from inside the container:
$ python manage.py migrate
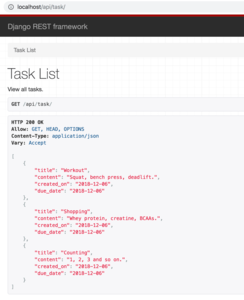
If you now refresh the page at http://localhost/api/task/, you should see the dummy data returned by the API:
Simplifying the API View
In this last section of this part of the tutorial, we will simplify the API view we wrote previously.
Edit the todoapi/views.py file and replace the contents with:
Pretty concise, right? Here we’re making use of the ListAPIView class. This creates a read-only endpoint that represents a collection of items, thus handling GET requests. We only need to specify the queryset and the serializer_class for this view.
ListAPIView is a generic view provided by DRF. Generic views make use of inheritance and are useful for building common API behaviours to interact with your database models.
You can read more about them in the generic views documentation. As a bonus for you, a good resource for seeing what each class-based view inherits is the website Classy DRF.
You can get to this stage of the code using:
$ git checkout v1.2
Summary
In this part of the tutorial, we’ve built a simple REST API using the Django REST Framework. The app is dockerized, with two Docker containers: one for the Django API and one for the PostgreSQL database that Django uses.
In the next part of the tutorial, we will look at creating and updating individual Task objects using the API.