In this article, you’ll learn how to add object level permissions in Django REST Framework (DRF).
This post is part of the Dockerized Django Back-end API with Angular Front-end Tutorial. Check out all the parts of the tutorial there.
In the last part of the tutorial, we’ve learned how to secure our Angular app using Auth0. In this blog post, we’ll learn how to add object level permissions to our Todo tasks so users can only edit their own tasks.
To get the code to where we left off in the last blog post, use:
$ git checkout v1.12
What are Permissions in DRF?
While we’ve learnt that authentication is used to associate an incoming request with the user that made the request, this is not sufficient to know if the user is allowed to access the requested resource. This is where permissions come into play.
From the DRF documentation:
Together with authentication and throttling, permissions determine whether a request should be granted or denied access.
Permissions are run at the very start of the view, before any code within the view is executed. Therefore, a user must be both authenticated and authorised before the API can fulfil the user’s request.
As a matter of fact, we’ve already used a permission setting within our Django API. In django/todoproj/settings.py, we’ve used the IsAuthenticated class in DRF to allow access to authenticated users only, and deny access to any unauthenticated user.
What are Object Level Permissions in DRF?
In DRF, object level permissions are used to decide if a user should be allowed to interact with a particular object. The object is usually simply a model instance.
Now that the theory is out of the way, how can we actually set permissions such that users are only able to see and edit just their own tasks?
Well, first of all we need to know which user created which task. This means that we need to change our Task model to include the user who created a task.
Inside django/todoapi/models.py, add the following model field:
Here, we’ve just added a created_by field to hold the user who created the specific Task instance.
Since we’ve changed our model, you’ve guessed it, we need to migrate our database to reflect the change. Spin up the Docker containers and run as usual:
$ docker exec -it dj bash
$ python manage.py makemigrations
$ python manage.py migrate
If you’re asked for a value for the created_by field for the existing dummy tasks, just select to input a one-off value and type dummy as the default value.
Making the created_by field read-only
Obviously, we don’t want our users to be able to modify the created_by field of their tasks. The field should just be automatically set on task creation.
To make the field read-only, modify todoapi/serializers.py as follows:
Using the extra_kwargs option, we specify that the field should be read-only.
Adding the username to the Task object
In this section, we’ll see how we can populate the created_by field with the user’s username.
Where does object creation take place? In the TaskList view, inside todoapi/views.py.
Modify this view as follows:
Let’s explain what’s going on here. First, notice that we’re overriding two methods: perform_create() and get_queryset().
By overriding the perform_create() method, we can change how we save an object. This is especially useful for setting model attributes that are implicit in the request, but that aren’t part of the request data.
We first get the JWT token from the Authorization header of the request (self.request.META.get('HTTP_AUTHORIZATION', '').split()[1]). After, we decode the token to get the body of the token, also called the payload, using an utility from the rest_framework_jwt library (payload = jwt_decode_handler(token)).
According to the Auth0 documentation, the payload contains a sub claim which uniquely identifies the user. This sub is guaranteed to be unique per user and it’s in the format (identity provider)|(unique id in the provider), e.g. auth0|123456789.
Next, we just look up the sub entry in the payload dictionary to get the username using auth0_user_id = payload.get('sub').
We call serializer.save() to create the new Task instance and inject the Auth0 username by passing created_by=auth0_user_id.
Overriding the get_queryset method
Next, by overriding get_queryset(), we change what’s returned when the user sends GET requests. Specifically, we only return the tasks associated with the authenticated user by filtering by the Auth0 username: Task.objects.filter(created_by=auth0_user_id).
Lastly, we notice that the code for getting the Auth0 username is duplicated in both overriding methods. So, let’s wrap this bit of code into an utility function.
In the django/todoapi directory, create a utils.py file with the contents:
Now in todoapi/views.py, we just import the function and use it to get the username:
This seems like a good place for a checkpoint, so you’re in luck as I made a v1.13 tag just for you:
$ git checkout v1.13
Alternatively, just look at my git commit.
If you now rerun the app, you’ll notice that we no longer see the dummy tasks, as we’re filtering on the Auth0 username.
Allowing only task creators to update or delete their tasks
In this section, we’ll create a DRF custom permission that checks to see if the requested task was created by the currently authenticated user.
Let’s create a new file todoapi/permissions.py with the following contents:
The has_object_permission method returns True if the request should be granted access, namely if the requested object’s created_by field is the same as the Auth0 username from the token. Otherwise, False is returned.
Next, let’s import this permission and add it to our TaskDetail view in todoapi/views.py:
Here, we set the permission policy at view level using the permission_classes class attribute. Because we’re overriding the default permission, we need to add the IsAuthenticated permission again.
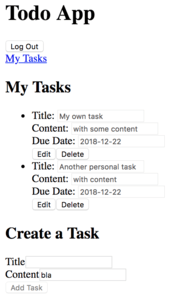
And that’s it for the development version of our Todo app! Users can now only view and modify their own tasks!
Just look how happy this person is:

To get the code to this point, just:
$ git checkout v1.14
Summary
In this part of the tutorial, we’ve seen how we can add object level permissions in the Django REST Framework to allow users to only see and edit their own Todo tasks.
In the next part of the tutorial, we’ll see how we can prepare our Django API for production deployment.